You can also download this here.
Due to significant performance issues on curtain wall projects, we have changed the methodology around how Curtain Walls are to be added. This applies from Dataset Release 16 (August 2024) and onwards.
Previously Curtain Walls were created using a grid and then panels were inserted into the grid. This resulted in panels being unique and had significant impacts on performance – particularly for large or complex curtain walls. We have now enabled Curtain Wall optimisation to improve the performance which has meant a change to the procedure for creating curtain walls.
To create a Curtain Wall
As always, the first step is to start a new quote and set up all the default options. It’s particularly important to select the correct or most common glass so there are minimal customisations later.
Once the quote defaults are set, select Add New Item from the Action bar and select one of the available curtain wall systems.
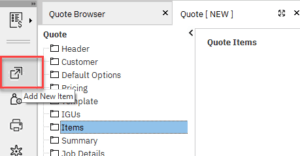
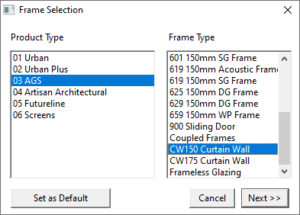
When you get to the Frame picker, ensure you select the appropriate Curtain Wall Wizard.
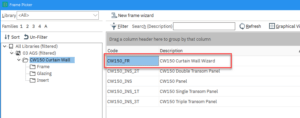
Once done, that will bring up the Grid Frame Wizard. Add the required total height and width, and also how many panels tall and wide.
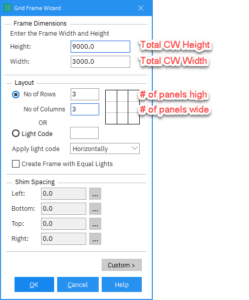
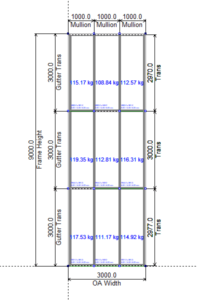
A curtain wall will then be created.
Add templates
The change of methodology means that Templates must be used to alter the curtain wall. Capral includes templates in each Curtain Wall product and can be added into the quote as per below.
Right-click in the Objects pane and select New Template From Resource.
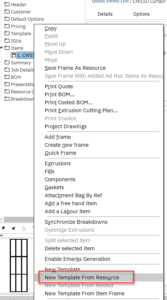
This will bring up the frame picker where you can then select the template that you require. If you require multiple templates, you will need to select New Template From Resource again from the Objects pane.
It is important that you only select frames that are from the product you are adding them to (i.e. as I am making a CW150 curtain wall, I will select CW150 panels from the CW150 Curtain Wall folder.
In this example I have added two different templates to my quote.
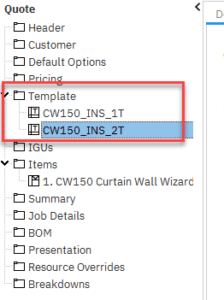
Add Templates to the Curtain Wall
This is where you may find the most difference in procedure. We have removed the Vertical Toolbar from the Curtain Wall products as you must add the templates using the Light by Light macro.
The first step is to run the Light by Light glazing macro.

This will bring up the normal Light by Light interface. Click the Units button.
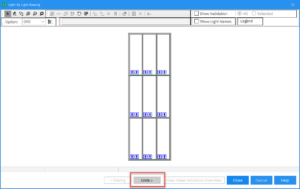
The screen will then change to the Unitised interface.
As you can see, the templates I added to the quote are on the left and our frame is on the right.
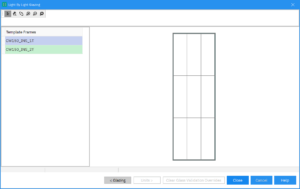
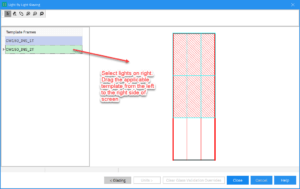
To add the templates to the frame, simply select the lights that require each template (you can multi-select using the Shift button on your keyboard), and then drag the templates from the left onto the right part of the screen.
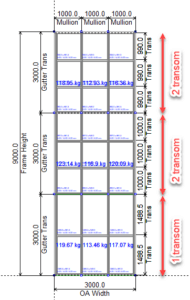
Below, I have added the two-transom template (green) to the top rows and the one-transom template (blue) to the bottom row.
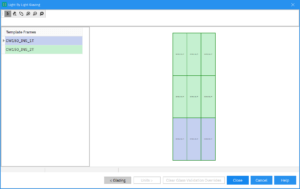
When I click Close, this will then be applied onto our frame.
Updating templates
If you want to make changes to the templates (such as changing the transom heights), you can do this by editing the template that is in the quote. This will then apply the same changes to all lights in the Item that are using the same Template.
Select the template from the list of templates. If you look at the design tab, it is likely that the template will not be the same size as the panels you are adding.
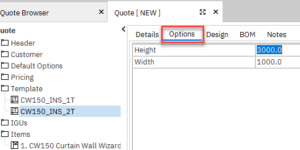
Go to the Options tab. This will allow you to change the height and width as needed (although this is not essential as the template will resize itself to suit the light).
If you want to adjust the transoms, go to the Design tab and simply change the dimensions. The important thing to note here is that the transom dimensions are relative to the template and may change when they get applied to the frame.
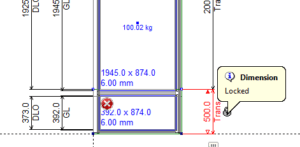
A way to get around this is to lock the crucial dimensions (note that one dimension must always be unlocked). To lock a dimension, simply select the one you want to lock and right-click on the Lock symbol.
Once you are happy with the design, ensure you click the Refresh Linked Nested Frames button at the bottom of the screen. This will update all the lights that are using that template (and are still linked).
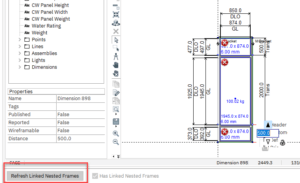
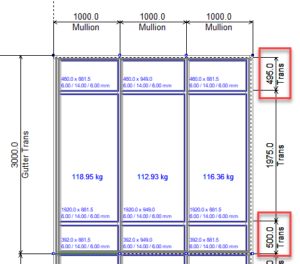
Just to reinforce the dimension locking, see below an example where I set the top and bottom transoms to be 500mm from the top and bottom respectively. I only locked the bottom dimension.
As you can see the bottom dimension stayed 500mm, but the top dimension adjusted to 495mm.